
Most "the meter is broken" calls we get turn out to be unpaid maintenance. A density meter does not fail the way a pump does — it accumulates. A film grows on the fork, the zero walks a little, the calibration note never gets written, and then one day the number is just incorrect enough to cost a batch. Good density meter maintenance is the procedure that stops that gradual creep before it reaches the product.

That is the part plants underestimate. The hardware is usually fine. What degrades is the agreement between the gauge and the fluid it measures, and that agreement is kept by people, on a schedule, with a pen.
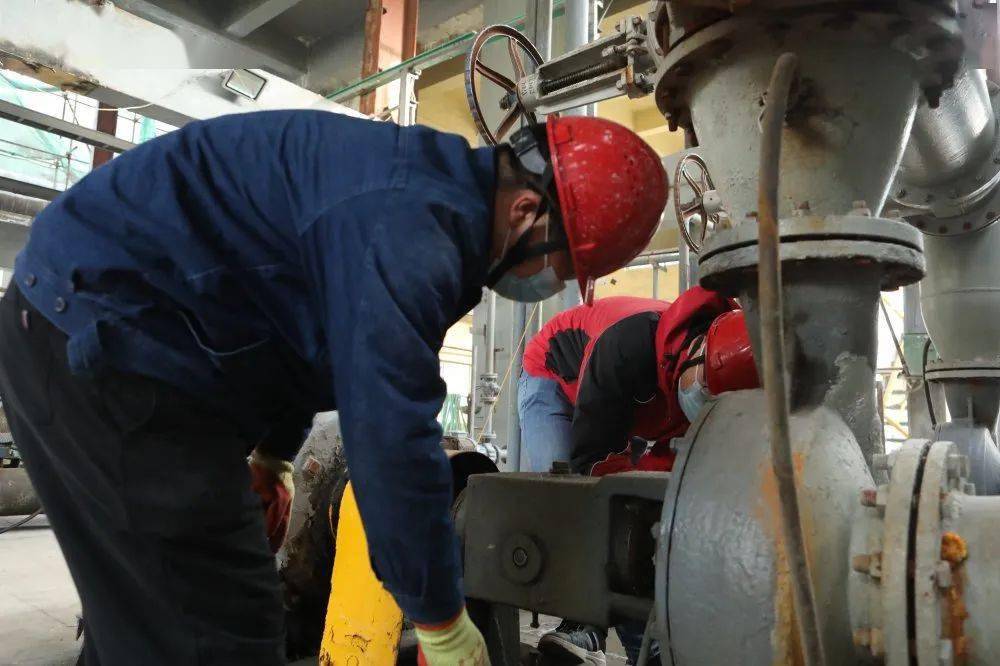
From the field. On a syrup blending line we were called to, the inline reading had drifted 0.004 g/cm³ low over two months — enough to throw off the Brix setpoint. The fork was not damaged; it wore a thin sugar coat that a planned monthly sample check would have flagged in week three. After a low-pressure clean and a two-point recalibration the loop returned to spec. No part replaced. The “failure” was a missed line on the maintenance sheet.

inline density measurement chemical plant

What the procedure actually protects

Maintenance is not about the box on the pipe. It protects the relationship the instrument has with the process: the zero it learned, the span it was taught, and the temperature curve it applies. Disturb any of those and the displayed value moves even though nothing is physically broken. The density measurement hub lays out the measurement principles; the job here is to keep them honest in service.

Two things go incorrect most often, and both are cheap to prevent:

  • Coating and fouling — sticky, scaling, or polymeric fluids deposit on the sensor. The reading drifts gradually, never enough to trip an alarm, always enough to mislead.
  • Lost calibration history — when a gauge is “recalibrated” without a record, you cannot tell a real process change from a walking zero.

Neither requires a spare part. Both require a calendar.

The monthly loop: signal and sample

A useful density meter troubleshooting procedure and a maintenance procedure start in the same place: two checks that take minutes and catch most troubles early.

  1. Verify the output against its expected range. Confirm the 4–20 mA or digital output sits where the stream says it should, with no error status. A reading pinned at one end, or fluctuating without a process reason, is a signal defect, not a density event.
  2. Compare the gauge to a lab or handheld reference. Pull a grab sample at the measurement point, measure it independently, and write the difference down. A drift beyond about 0.002 g/cm³ is the trigger to recalibrate, not to keep watching. This is also the independent proof that the inline cell has not walked — inline controls, the lab confirms.

The second check is the one plants skip, and it is the one that matters. A meter that agrees with itself but disagrees with reality is a confident deceiver. For the difference between inline and off-line verification, the inline versus laboratory density measurement guide explains where each belongs.

Cleaning the sensor without breaking it

Cleaning is where good intentions do damage. The fork's tines are tuned to vibrate at a precise frequency; bend them and you have changed the instrument.

  • Use low-pressure flush, never a pressure washer. High-pressure water can deflect or permanently bend tines, especially on close-spaced designs. Flush with the appropriate solvent, soak stubborn coating rather than scraping it.
  • Soft tools only. A soft brush or cloth, never a wire brush or metal scraper on the sensing surface. You are protecting a coating — PTFE or similar — that is part of the measurement, not just cosmetics.
  • Clean on a by-pass, not on a shutdown. Where the fluid coats, a by-pass loop lets you isolate and flush the sensor without stopping the line. For slurry and scaling services this is the difference between a ten-minute clean and a half-day outage.

After any cleaning, always re-run the zero and span check. A short flush log signed by the technician turns a vague claim of ‘we cleaned it’ into proof the loop was restored. Cleaning disturbs the very agreement maintenance exists to protect.

A tuning-fork density meter and an ultrasonic density meter foul differently — fork tines load mechanically, ultrasonic faces attenuate acoustically — but the rule is the same: clean gently, then validate.

The calibration record is the instrument

If a calibration is not written down, it did not happen. The record is what turns a number on a screen into evidence you can defend in a quality audit or a custody-transfer dispute.

A minimal record carries: date, who performed it, the benchmark fluids used (with their traceable densities and temperatures), the zero and span values before and after, and the interval set for the next check. Reference fluids should be traceable to a national metrology institute — deionized water at 20 °C is 0.9982 g/cm³, a free, traceable span point for aqueous processes. Food and pharmaceutical lines require the calibration certificate on file; process plants require the trend.

This is where inline density measurement methods and maintenance meet: the method defines the calibration philosophy, and the record proves you followed it.

When to pull the instrument, when to leave it

Not every anomaly is the instrument. Before you wrench it out, isolate it. Close the upstream valve, flush with a known benchmark fluid (water at 20 °C for aqueous streams), and read it. If it is correct in the benchmark fluid, the defect sits upstream — bubbles, two-phase flow, a temperature gradient the gauge cannot see. If it is still incorrect in the benchmark fluid, the defect lies with the gauge: coating, calibration drift, or a failed sensor element.
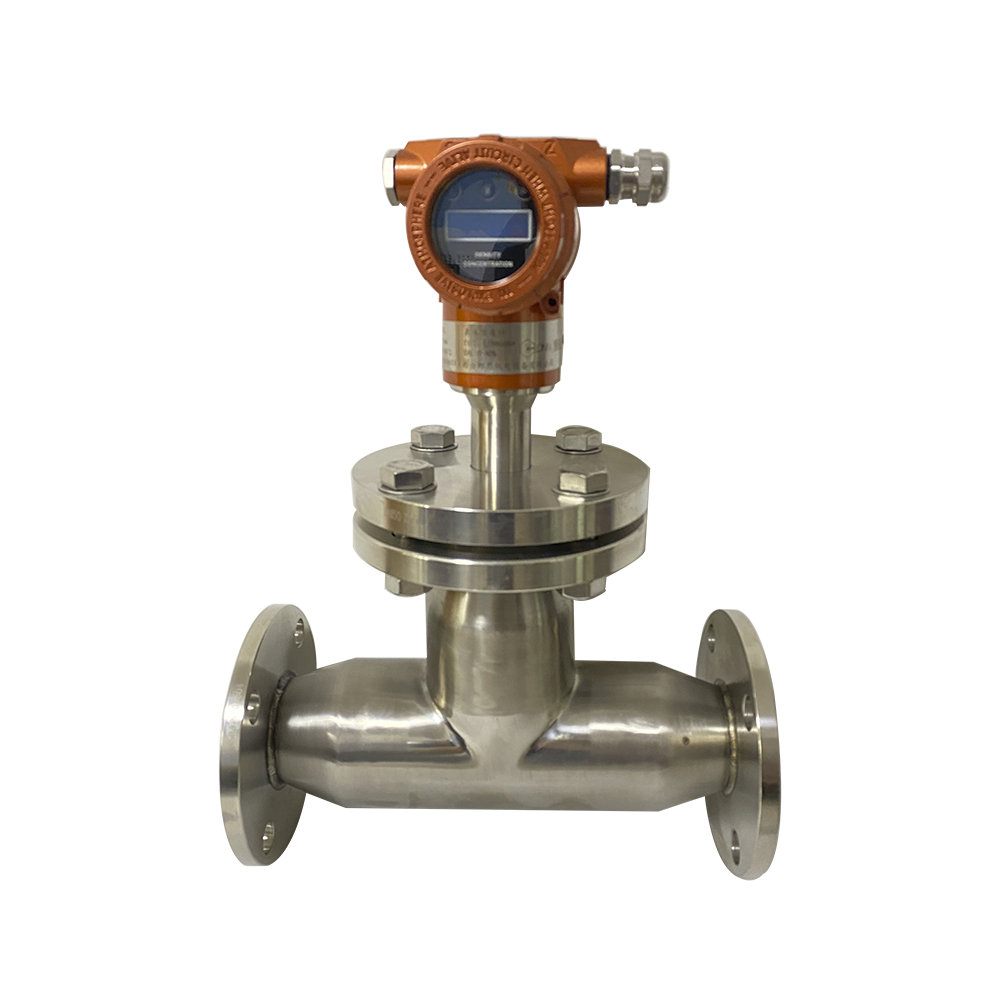
That test saves more unnecessary pull-outs than any other habit. A simple tag on the cable with the last-calibrated date spares the next shift a guess about what they are trusting. It also tells you whether to reach for a wrench or a phone. The density meter selection guide covers which designs tolerate which fluids, which is the long-term lever on how often you will be out there cleaning at all.

IMG 0641

A maintenance schedule that matches the fluid

Calibration intervals printed in a catalogue are a starting guess, not a law. The fluid decides. The table below is a working baseline; tighten it when service is harsh, loosen it when the stream is clean.

ServiceVerify against sampleFull calibration
General chemical processEvery 6 months12 months
Clean petroleum productsEvery 6 months12 months
Mining slurry / abrasiveEvery 3–6 months6–12 months
Food, pharma, safety-criticalEvery 3 months6 months
Custody transferMonthly3–6 months

Field crews who photograph the transmitter display during each visit build a visual log that catches gradual drift a spreadsheet often misses. A practical density meter maintenance kit on every site narrows the gap between a planned shutdown and an unplanned one. A calibrated loop tester, a low-pressure flush adapter, spare gaskets sized to the flange, and a laminated reference chart turn a vague 'looks fine' into a documented verification. Crews that carry the kit close the loop without a second trip. Hazardous-area installations carry one more duty: periodic inspection of the Ex certification, seals, and cable entries — typically every three years, on the authority's schedule rather than yours. None of it is dramatic. A worn gasket or a loose gland is a quiet leak waiting to contaminate the electronics, so the housing gets a quick look on the same round. All of it is cumulative, and it is why a one-time commissioning check is not a maintenance program.

Frequently asked questions

How often should I recalibrate an inline density meter?

At least annually for benign service. In abrasive, coating, or safety-critical fluids, validate against a benchmark sample every three to six months and recalibrate on that evidence. Let observed drift set the interval, not the calendar.

Can I clean the fork with a high-pressure washer?

No. High-pressure water can bend the tines and change the vibration frequency permanently. Use low-pressure flushing with the right solvent, soak stubborn coating, and re-zero afterward.

What does a drift beyond 0.002 g/cm³ mean?

It is the threshold at which a grab-sample comparison says “recalibrate,” not “keep watching.” Small, steady drift usually means coating or a walking zero; a sudden jump usually means a process upset or a failed element. Isolate with a reference-fluid flush to tell which.

How do I know if the defect lies with the gauge or the process?

Flush the gauge with a known benchmark fluid while isolated. Correct in benchmark fluid means the stream is the culprit (bubbles, two-phase flow, temperature gradient). Still incorrect means the instrument is (coating, calibration, or sensor failure).

Do hazardous-area density meters require extra maintenance?

They require the same checks plus a periodic Ex inspection — seals, cable entries, and certification validity, typically every three years per the local authority. The intrinsic-safety barrier and gland integrity are part of the measurement, not just compliance.

About LONNMETER GROUP. We design, manufacture, and support inline density meters for chemical, mining, food, and pharmaceutical service. This guide is informational and does not replace the calibration procedure supplied with your instrument; reference values and temperature ratings should always be confirmed against the device datasheet. Standards referenced in our measurement work include ISO 15212 (vibrating density meters) and ASTM D4052.

Explore density meter applications or talk to our application engineers about a maintenance interval matched to your fluid.

Leave a Reply

Your email address will not be published. Required fields are marked *